前言
本文讲的是使用flutter时,如何使用dio进行网络层封装的解决方案。
相关链接
1). flutter
2). dio
进入正题
安装dio
打开pubspec.yaml文件,导入dio包,并安装依赖,代码如下:
1 | dev_dependencies: |
2 | flutter_test: |
3 | sdk: flutter |
4 | dio: ^3.0.9 |
具体实现
接下来是具体的实现步骤,先上一个目录图
![]()
新建目录
config,新建文件config.dart,定义ENV基类,代码如下:1import 'package:flutter/material.dart';23class ENV extends InheritedWidget {4static String appName; // 系统名称5static String envName; // 运行环境6static String baseUrl; // 基础url78ENV({9String appName,10String envName,11String baseUrl,12Widget child,13}) : super(child: child){14ENV.appName = appName;15ENV.envName = envName;16ENV.baseUrl = baseUrl;17}1819static ENV of(BuildContext context) {20return context.dependOnInheritedWidgetOfExactType(aspect: ENV);21}222324bool updateShouldNotify(InheritedWidget oldWidget) => false;25}分离构建环境,区分
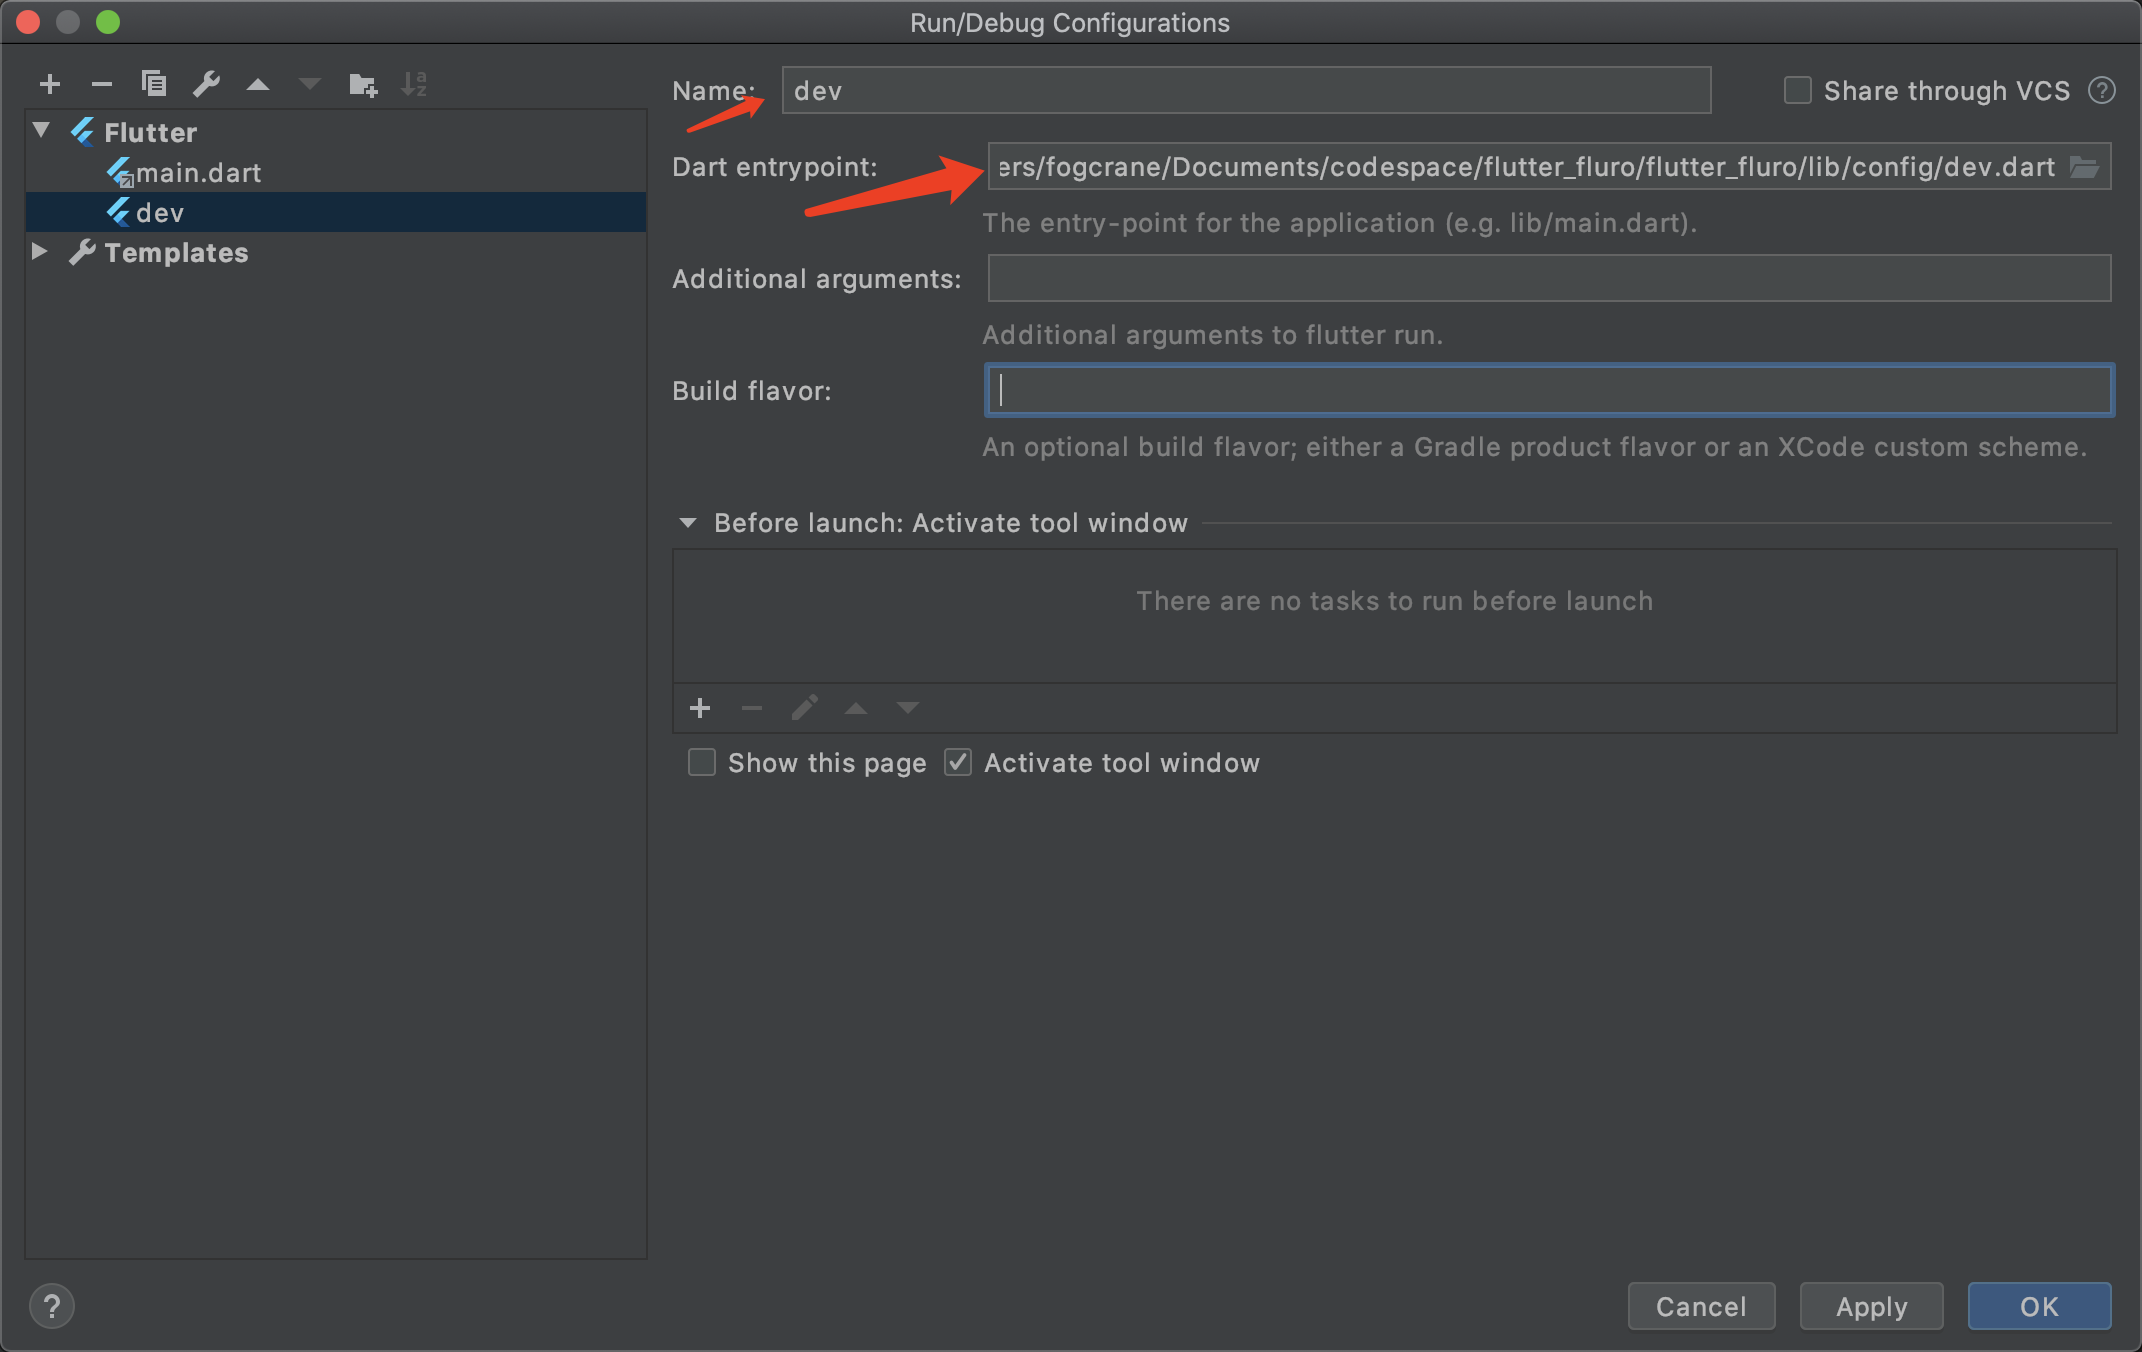
dev和prod环境。新建dev.dart以及prod.dart,分别作为开发环境以及生产环境的构建脚本。代码如下:1// dev.dart2import 'package:flutterfluro/main.dart';3import 'package:flutter/material.dart';4import 'package:flutterfluro/config/config.dart';56void main() {7var configuredApp = new ENV(8appName: 'flutter_fluro_dev',9envName: 'dev',10baseUrl: 'http://127.0.0.1:9991/v1',11child: new MyApp(),12);13runApp(configuredApp);14}

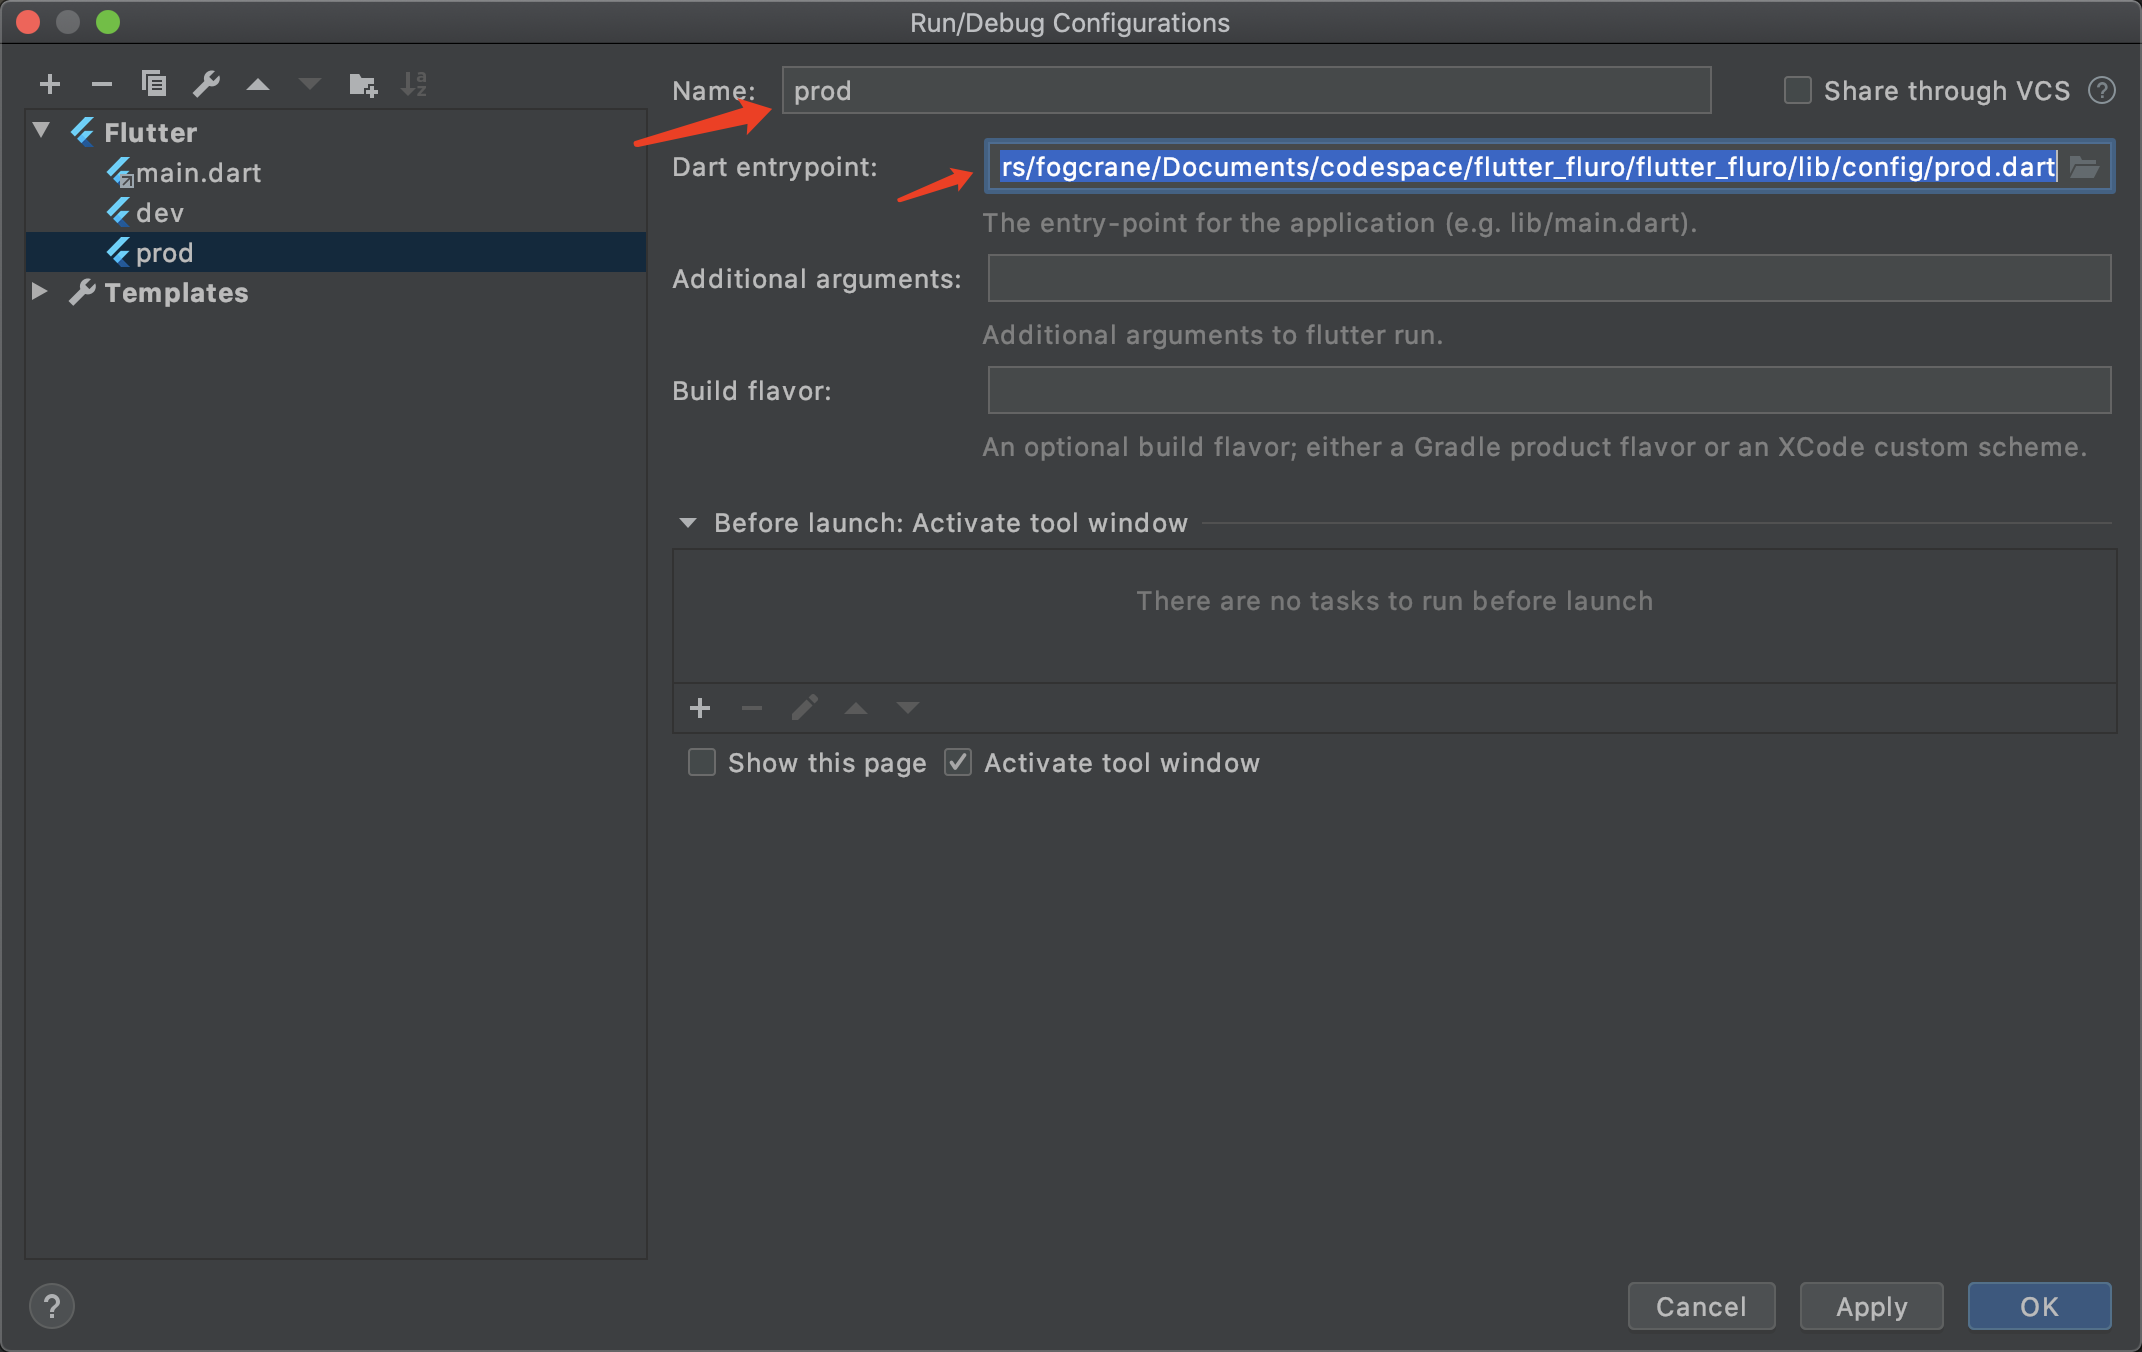
1 | // prod.dart |
2 | import 'package:flutter/material.dart'; |
3 | import 'package:flutterfluro/main.dart'; |
4 | import 'package:flutterfluro/config/config.dart'; |
5 | |
6 | void main() { |
7 | var configuredApp = new ENV( |
8 | appName: 'flutter_fluro_prod', |
9 | envName: 'prod', |
10 | baseUrl: 'http://127.0.0.1:8888/v1', |
11 | child: new MyHomePage(), |
12 | ); |
13 | runApp(configuredApp); |
14 | } |
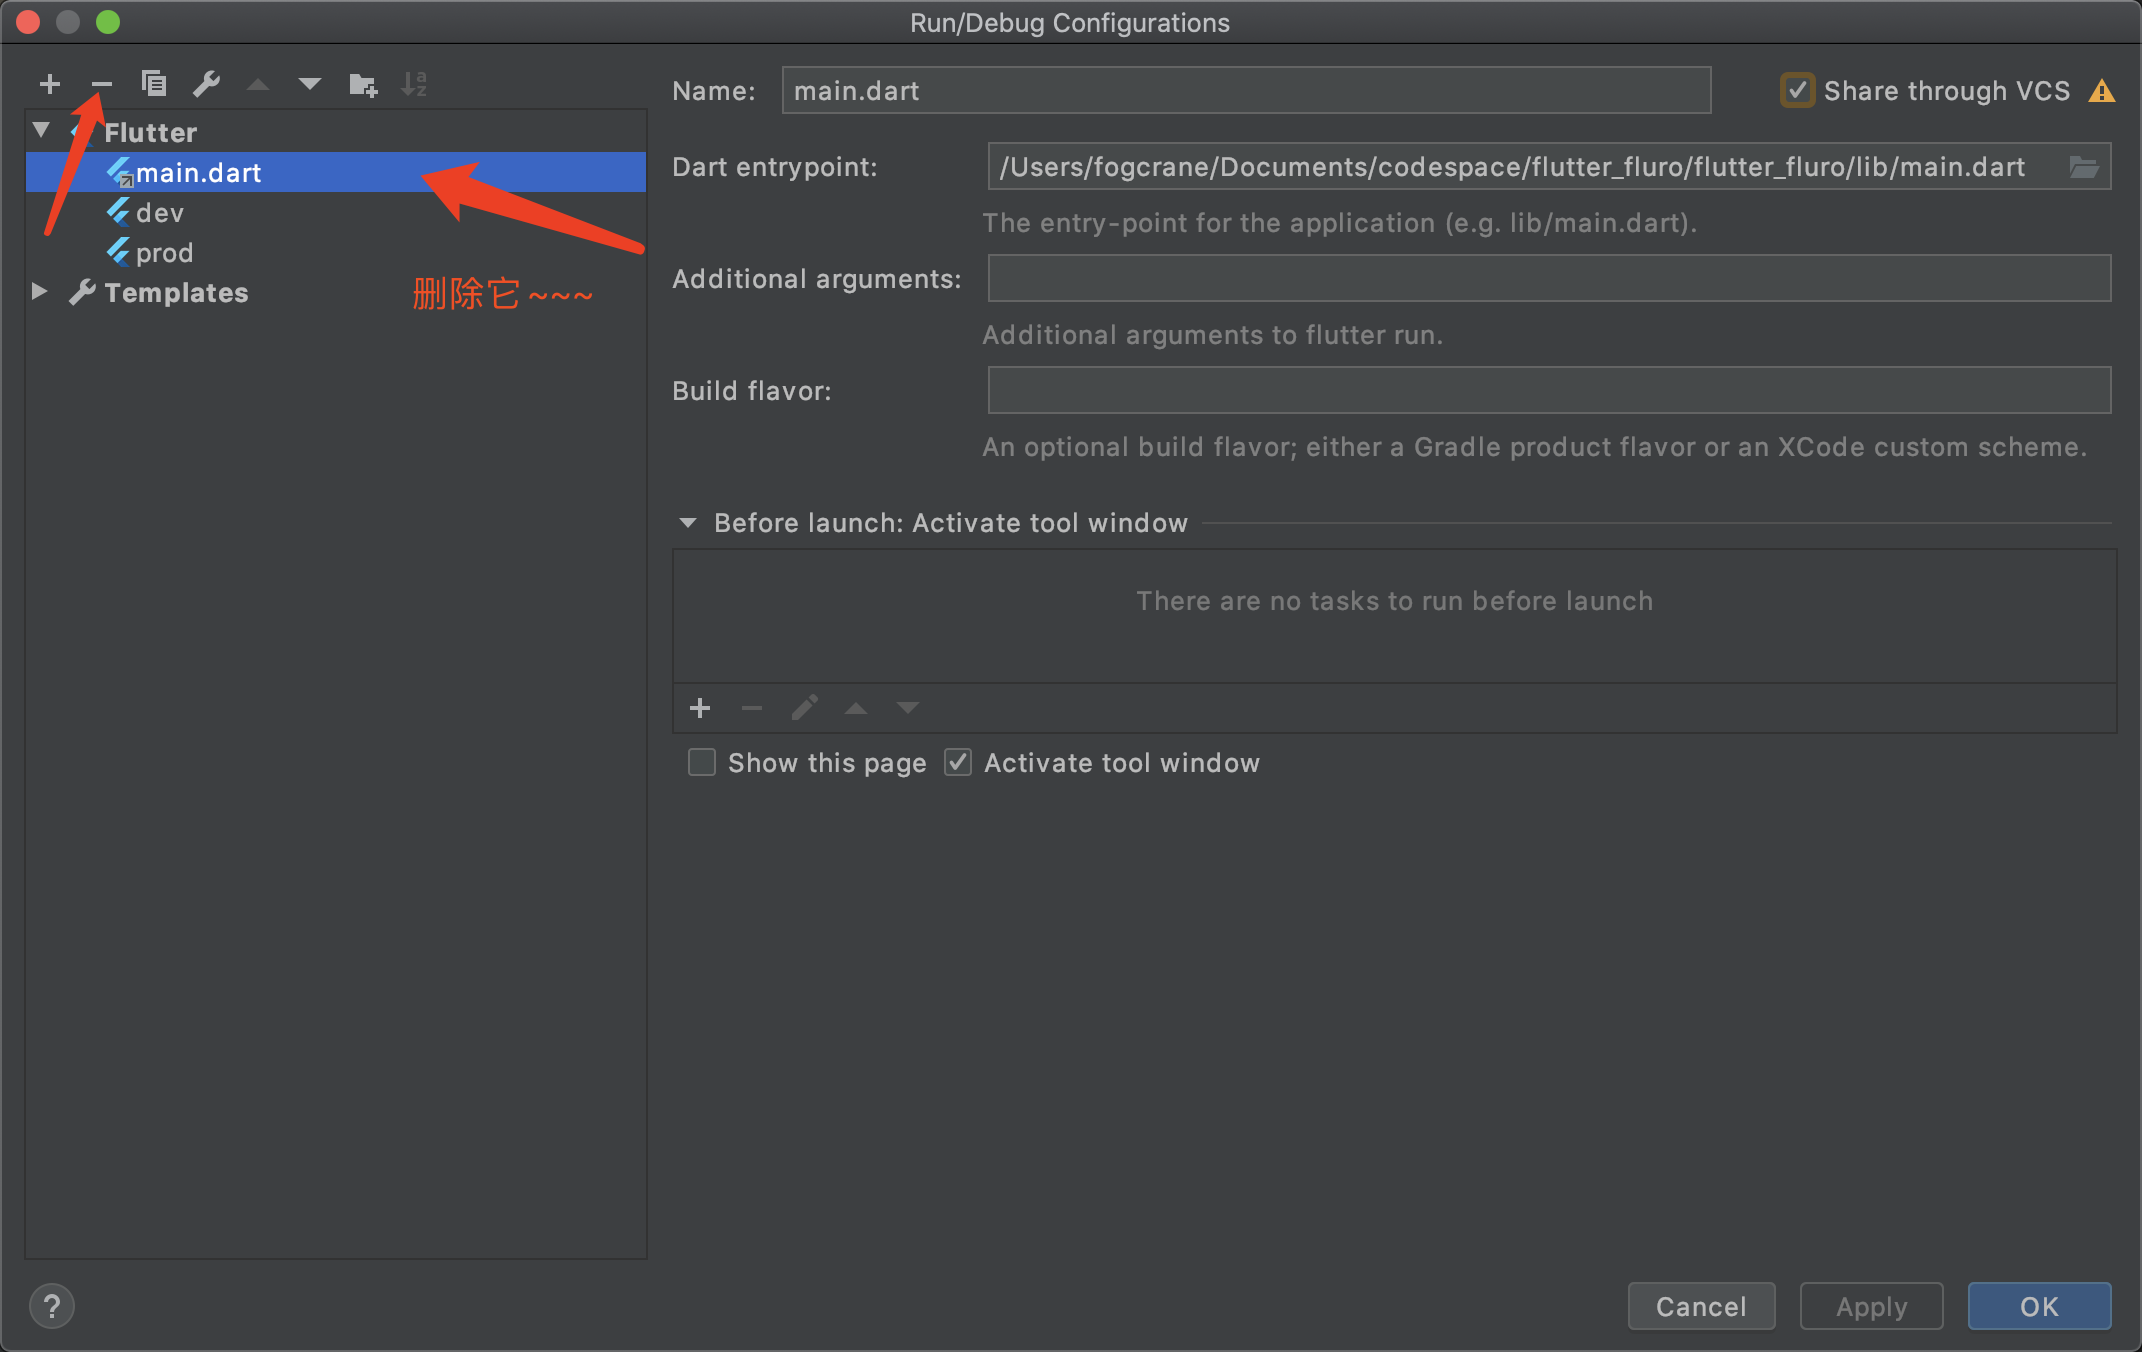
配置构建环境启动方式,如下图:
![]()
![]()
![]()
![]()
新建文件
http.dart,封装网络层,代码如下:
1 | import 'package:dio/dio.dart'; |
2 | import 'package:flutterfluro/config/config.dart'; // `flutterfluro`替换为自己对应的目录名 |
3 | |
4 | final dio = Dio(BaseOptions( |
5 | baseUrl: ENV.baseUrl, |
6 | connectTimeout: 5000, |
7 | receiveTimeout: 100000, |
8 | contentType:"application/json; charset=utf-8", |
9 | )); |
10 | |
11 | Future main({String url = '', String type = 'get', Map<String,dynamic>data}) async { |
12 | type = type.toUpperCase(); |
13 | if(data != null) { |
14 | data.containsKey('id') ? url = url + '/' + data['id'] : url = url; |
15 | } |
16 | print('请求参数: url: $url, type: $type, data: $data'); |
17 | |
18 | if (type == 'POST') { |
19 | Response response; |
20 | await dio.post(url, data: data).then((res) { |
21 | response = res; |
22 | }).catchError((err) => throw Exception('$url: $err')); |
23 | return response.data; |
24 | } |
25 | |
26 | if (type == 'GET'){ |
27 | List getParams = []; |
28 | |
29 | if (data != null && data.containsKey('params')) { |
30 | data['params'].forEach((k, v)=> getParams.add("$k=$v")); |
31 | String str = getParams.join('&'); |
32 | url += '?' + str; |
33 | } |
34 | Response response; |
35 | await dio.get(url).then((res) { |
36 | response = res; |
37 | }).catchError((err) => throw Exception('$url: $err')); |
38 | return response.data; |
39 | } |
40 | |
41 | if(type == 'PUT') { |
42 | Response response; |
43 | await dio.put(url, data:data).then((res) { |
44 | response = res; |
45 | }).catchError((err) => throw Exception('$url: $err')); |
46 | return response.data; |
47 | } |
48 | |
49 | if (type == 'DELETE') { |
50 | Response response; |
51 | await dio.delete(url, data:data).then((res) { |
52 | response = res; |
53 | }).catchError((err) => throw Exception('$url: $err')); |
54 | return response.data; |
55 | } |
56 | } |
新建目录
api,新建文件interface.dart,定义对应的网络请求。代码如下:1import 'package:flutterfluro/config/http.dart';23class Fetch {4static getArticle(params)=> main(url: '/article', type: 'get', data: params);5}新建目录
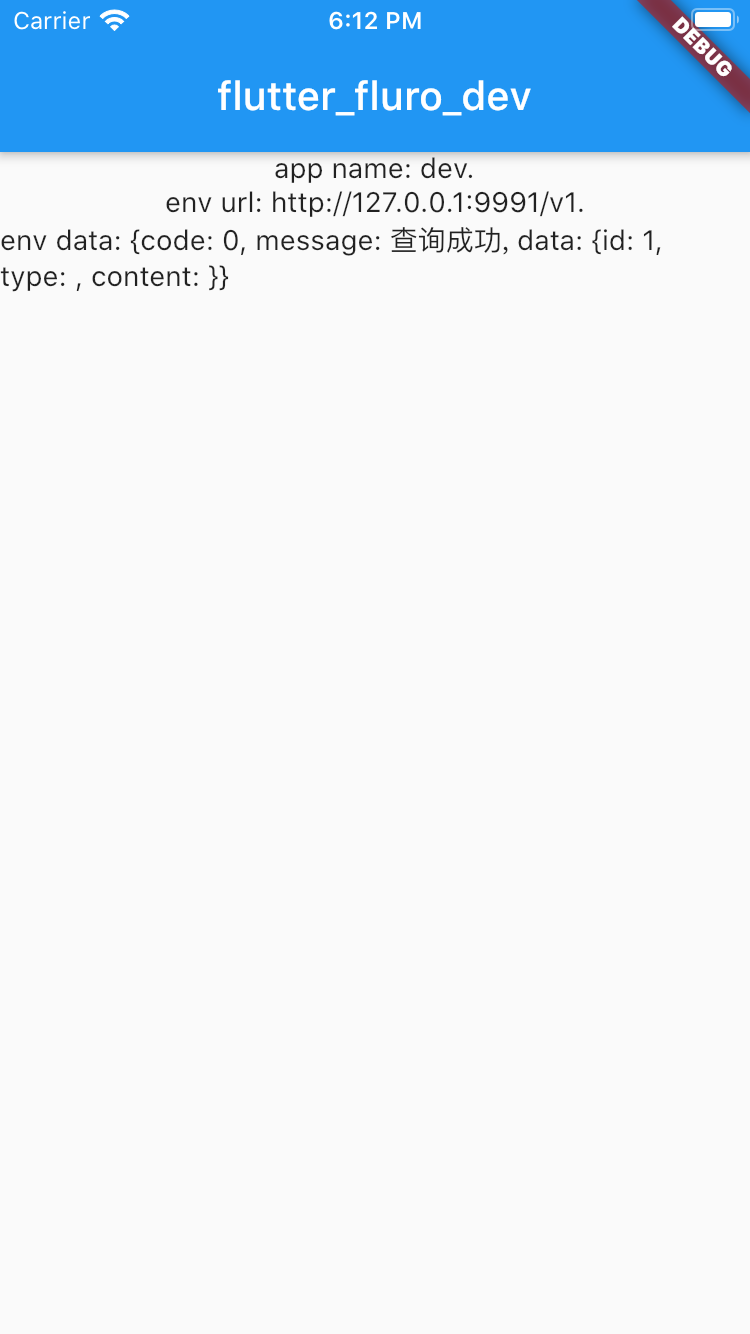
pages,新建index.dart,作为应用的主页面,代码如下:1import 'package:flutter/material.dart';2import 'package:flutterfluro/config/config.dart';3import 'package:flutterfluro/api/interface.dart';45class MyHomePage extends StatefulWidget {67_MyHomePageState createState() => new _MyHomePageState();8}910class _MyHomePageState extends State<MyHomePage> {1112Object data;1314void initState() {15super.initState();16loadData();17}181920Widget build(BuildContext context) {21return Scaffold(22appBar: AppBar(23title: Text(ENV.appName),24),25body: Center(26child: Column(27mainAxisAlignment: MainAxisAlignment.start,28children: <Widget>[29Text('app name: ${ENV.envName}.'),30Text('env url: ${ENV.baseUrl}.'),31Text('env data: $data'),32],33),34),35);36}3738void loadData() async{39Map article = await Fetch.getArticle({ 'id': '1'});40data = article;41}42}修改
main.dart,引用index.dart。代码如下:1import 'package:flutter/material.dart';2import 'package:flutterfluro/pages/index.dart';3import 'package:flutterfluro/config/config.dart';45class MyApp extends StatelessWidget {67Widget build(BuildContext context) {8return new MaterialApp(9title: ENV.appName,10theme: new ThemeData(11primarySwatch: Colors.blue,12),13home: new MyHomePage(),14);15}16}启动服务,效果如下图:
![]()